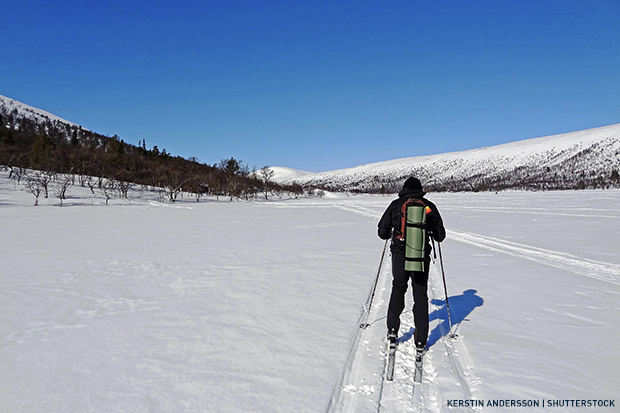
Cross-country skiing trails take you away from the busy main ski pistes and lift queues you get caught up in when downhill skiing, and give you a different perspective of the surrounding countryside and mountains. You will probably have read Part 1, where Alessia Francini-Beaumont, our resident cross-country skiing instructor, answered some common questions about the winter sport, explained how it differs to downhill skiing and gave some top tips for beginners. In Part 2 we move on to the important techniques that you’ll need to be familiar with before starting off…
Cross-country skiing has two basic styles, which apply to different surfaces: classic (on a prepared track, or loipe) and skate skiing (on firm, smooth snow). When using the classic style of skiing, your skis will be textured (fishscale) or waxed in the middle of the ski under the foot (the binding area), which provides traction on the snow to allow you to slide the other ski forward.
For the purpose of this guide, Alessia focuses on classic skiing, as this is how we suggest you start as a beginner. The alternating motion of the legs and arms in diagonal stride is the same as in walking or running.
Classic skiing
The basic steps
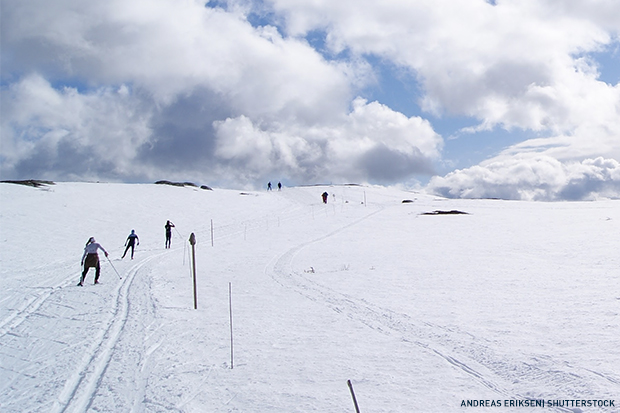
The classic style is often used on prepared trails that have pairs of parallel grooves (tracks) cut into the snow by a machine. Ready for you to simply slot your skis in and go. It is also a common technique where no tracks have been prepared (off-piste). You’ll push each ski forward from the other stationary ski in a striding and gliding motion, alternating foot to foot.
There is specialised equipment adapted to each style. In classic skiing and skate skiing, poles with baskets are important to use to help push you forward and glide along using your arms. Alternating the poles is the most common technique in classic skiing, compared to skate skiing when you’ll more often use both poles at the same time (double poling). (There’ll be more on equipment in Part 3).
Going up a hill
When going up a hill, stepping out of the track into the smooth ploughed area is the best way. From here you can use the herringbone technique, where you’ll take alternate steps up the hill with the tips of your skis pointed outwards. Top tip: Make sure the inside edge of the ski is angled down into the snow; this will help with traction so you don’t slip.
For gentler slopes, you can use the classic style with shorter strides and greater arm force on the poles.
What goes up must come down…
So you’ve reached the top of a hill and now you need to know how to come back down (descend). Going down a long gentle slope is fun and relatively easy – you just need to keep your skis in the tracks, keep your poles under your arms, lean forward, maintain your balance and enjoy the ride. If, however, the hill is steeper, it’s important to use the snowplough technique to reduce your speed. Stepping out of the track, you’ll turn your skis inwards to create friction to slow you down. You should be aware of who is around you when snow ploughing, taking care not to let your poles stick out and potentially injure other skiers. Top tip: Make sure you angle your feet so that the inside edges of the skis are angled downwards. The larger the snowplough, the larger the braking force.
Especially good for beginners is the half snowplough, where you’ll take one foot out the track and start braking with that foot only.
Feeling confident and seem to have mastered the downhill technique? You might like to try the double-pole technique to gather extra speed in the track, where you push with both poles at the same time. Be careful not to reach your arms forward too far, though, as this can affect your balance and uses more energy that should be used instead to help you glide further. Top tip: Poles aren’t just for direction, but to help you to glide along on the snow, so make sure you give your legs a bit of help and use them to your advantage!
How to get up from a fall
Even the professionals fall from time to time, so there’s nothing to be wary of. If you do fall, it’s not going to be a pretty sight; chances are you’ll be sprawled out with your skis everywhere. It can be tricky to get back up again, so learning from a guide how to do this is invaluable.
Flat terrain:
Hillside:
Rules of the track: Very much like on the motorways, you should always look around you before overtaking a slower skier. Whether there is one track or three, you just need to step out of the track onto another track or the firm, smooth snow before returning to your track. If you don’t move over, although you won’t have lights flashing at you from behind like on the roads, you may encounter a more experienced skier asking you to move out of their way!
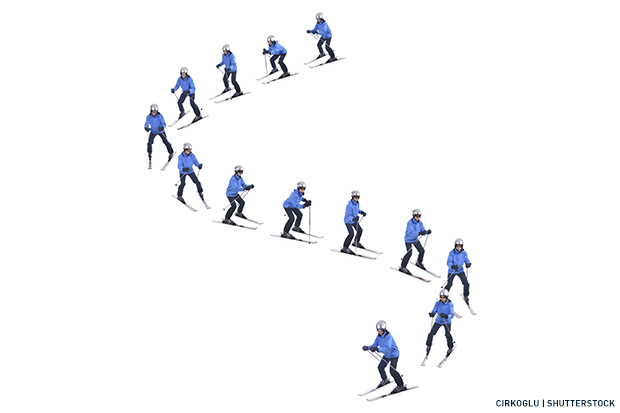
Skate skiing
This more advanced type of skiing requires a different set of equipment, with longer poles, shorter skis and higher boots. Completely off the tracked snow, and similar to ice skating, you will ski on smooth, hard snow by pushing alternating skis away from one another at an angle. Skate skiing is faster and you have more freedom to move, but it does require more balance as you swing from one ski to another rather than doing the diagonal stride. Ask your ski guide if you’d like to try skate skiing.
Are you intrigued by cross-country skiing? Headwater has cross-country skiing holidays in Venabu, Norway; Kandersteg, Switzerland, and Leutasch, Austria.
Look out for Part 3 of the guide coming in two weeks, where we’ll talk you through the equipment needed, including clothing and footwear!
Are there any questions about cross-country skiing that Alessia can help you with? Leave them in the comments below!
Our carefully planned walking and cycling holidays in locations all around the world let you explore at your own pace, with time to take in the local culture, history and nature along your route. Hand-picked family-run accommodation provides welcoming comfort at the end of each day, with every hotel and guest-house being chosen for its friendly atmosphere, delicious food featuring regional specialities, and unique character.
