In a previous post I described long exposures and how, with a few basic setting adjustments to your camera, you can start capturing some amazing images. Below I cover some examples of where you can use long exposures to great effect. Why not try some of these out on your next Headwater Holiday?
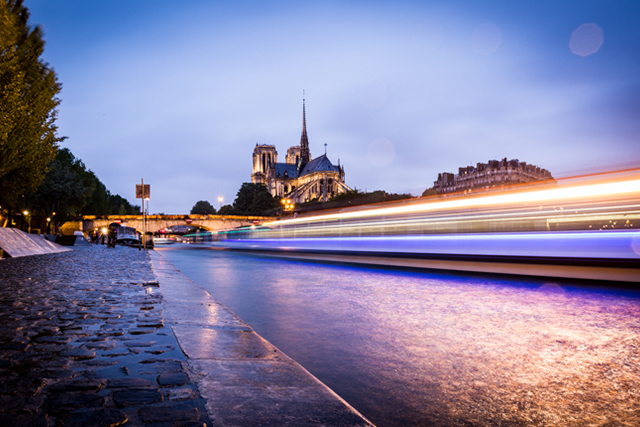
One of the best ways to transform a cityscape or urban scene is through the use of light trails. These can add a dynamic feature to an otherwise static scene through bright streaks of colour and motion.
A light trail can be created by any light source moving through your image while the shutter is open. This could be a car, bus, bike, boat or even a person with a torch or phone. The evening blue hour (twilight) is normally the best time for this as there is more traffic on the road and street and building lighting lifts the rest of the scene.
To get the cleanest light trails, open the shutter before the moving light source enters the frame and close it once it is fully out of shot. Shoot in Bulb mode so that you can control the exact timing of the shot as well as the length of the exposure to ensure you capture enough light for the whole scene and not just the trail.
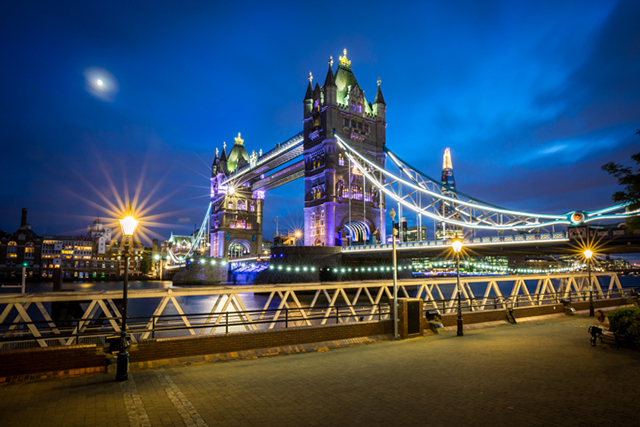
Turn street lights into star bursts to add a striking impact to your urban scenes. To create star bursts use a small aperture (higher f/stop) of between f/14 and f/20. The more diaphragm blades your lens has and the longer the exposure time, the more pronounced the effect.
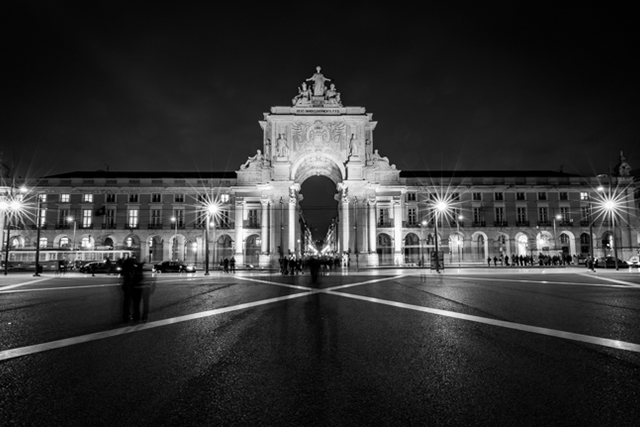
Ghosting is caused when people in your frame move during a long exposure. While this is often unavoidable in busy areas, if the people are constantly moving, and the exposure is long enough, then they may not appear. However, you can create some fun effects with ghosting so why not get your travelling companions involved and have a bit of fun creating them.
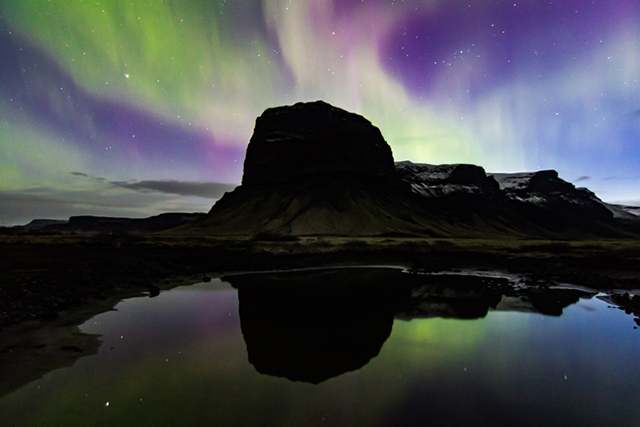
The Aurora Borealis aka Northern Lights are an amazing natural phenomenon found in countries such as Iceland, northern Scandinavia and Canada (and on occasion can even be seen from parts of the UK). It relies on a combination of conditions including a clear sky, limited light pollution and of course a reasonable level (measured as Kp) of Aurora.
If you are lucky enough to see the lights then shooting them is actually relatively simple using long exposures. You don’t want your exposure to be too long so that you start to get movement in the star but you need it to be long enough to light the scene and to give yourself an interesting foreground.
As autofocus will be difficult in almost complete darkness, set the focus to infinity (lenses often have an indicator on them showing infinity). Use the widest possible aperture (ideally f/2.8 or wider) on a wide angle lens (to capture as much of the sky and foreground as possible). Set your ISO as high as your camera can comfortably produce clean images (I would suggest trying between ISO 2000 and ISO 3200 depending on your aperture) and then a shutter speed of around 15-20 seconds. Review your shot and adjust the ISO and shutter speed accordingly.
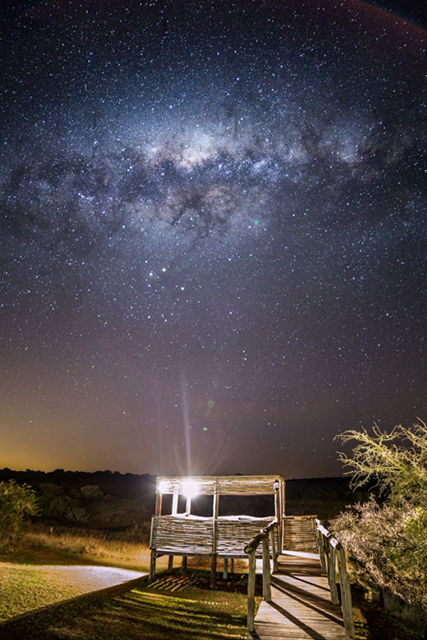
With a technique similar to shooting the Aurora, the Milky Way also makes for some incredible images, especially when the galactic centre is fully visible. The summer months are typically the best for shooting the Milky Way which can lead to some unsociable shooting time as you wait for darkness. Again a clear sky and no light pollution are key so head away from towns or cities to dark sky areas and use similar settings to the Aurora to compensate for the darkness.
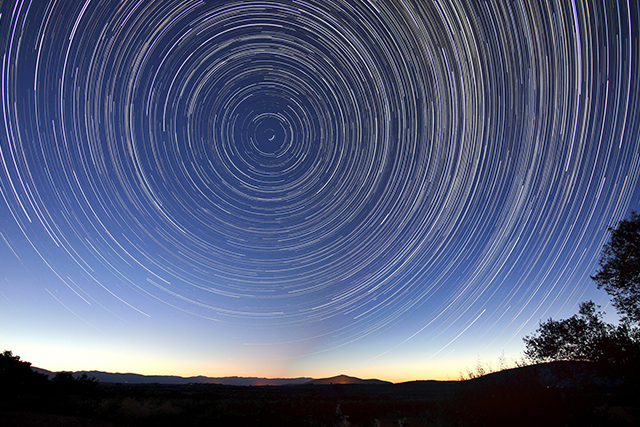
As the earth rotates, long exposures will turn the light of the stars from tiny dots into little streaks. The longer the exposure the longer the streaks. If you shoot a series of long exposures continuously over a period of time i.e. 2 to 3 hours you can stitch them together using PhotoShop or an online star stacker tool such as StarStaX to get dramatic star trails.
In terms of composition, if you can find the North Star you will notice that the stars’ movement forms a circular pattern around it. Again remember an interesting foreground feature will also help your star trail stand out.
A camera timer is invaluable to program the intervals and the number of exposures you want so you can sit back, relax and enjoy the night sky. Also remember to pack plenty of spare batteries and memory cards!
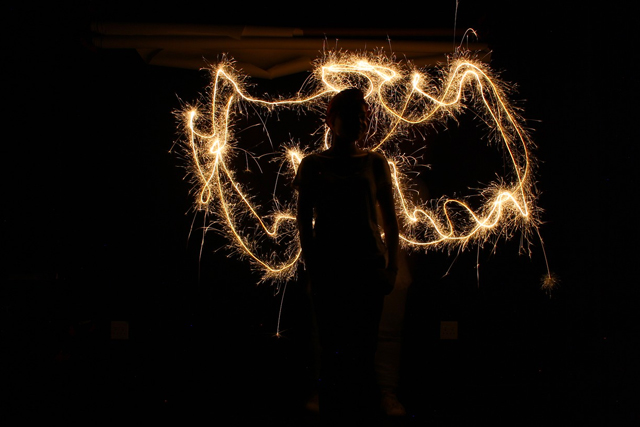
During low light or night shooting, a fun way to highlight an object in your scene is light painting. Light painting can also be used to create fun effects in your image. The best light painters combine a variety of light sources such as torches, flashes, lit wire wool along with coloured gels, strobes and so on to create some amazing effects.
A great one to start with is light writing. Not only can you include your friends and family in the process but it is very simple to do. Set your camera up on a tripod as you would with the techniques above and use the torch function on your mobile phones to write letters or words. With a bit of practice you can really get some creative results.

Next time you head to a fireworks display why not have a go at photographing them. Set a low ISO of 100 or 200 and switch to Bulb mode on your camera. Set a medium aperture of between f/8 – f/11 and use a remote release to time when you open and close the shutter.
Unless you have a clear focal point to use then focus to infinity to stop your camera hunting for focus while you are shooting. Trigger the remote just before the firework bursts and close it again once enough light has entered (check your images to get an idea of what is working).
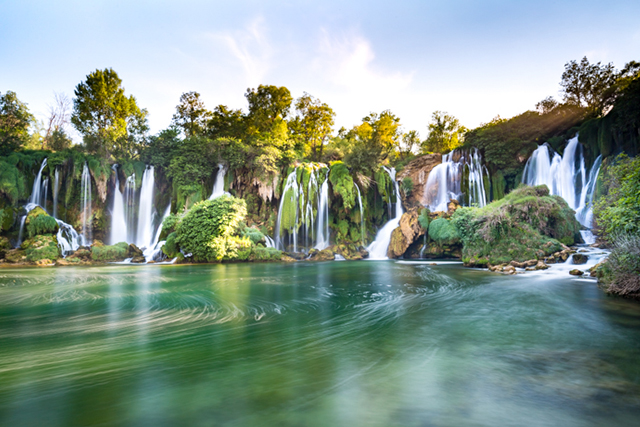
Most of the examples above showcase techniques that work in low light or even complete darkness. With waterfalls these are something you are most likely going to shoot during daylight. If that is the case, the main difference with all of the previous examples is that you will need to use a Neutral Density (ND) filter to control the light.
ND filters are dark pieces of glasses which cover the front of your lens to reduce the amount of light that enters. In daylight they therefore allow you to do the longer exposures required to blur or smooth the water (as it takes longer for the camera to receive the amount of light required to expose the scene).
As some ND filters are very dark you may need to compose your shot and find your focus first before adding the filter. Try shooting in manual mode starting with a setting of ISO 100 and a medium aperture of between f/8 – f/11. You can play with shutter speed to get the desired effect in the water but be careful your water does not over expose (which can happen if it is a bright day and your exposure time is too long). Check your results and adjust your aperture and shutter speed accordingly.

It is not just waterfalls that can benefit from long exposures. Any body of water from the sea to lakes can be smoothed into a calm, flat, almost glass like surface through the use of long exposures.
Smoothing the water can keep an image clean and distraction free by removing the surface ripples as well as boost reflections or the colours of a sunset. Short exposures of a fraction of a second to a couple of seconds can also show the motion of waves or the patterns of tides in the sea.
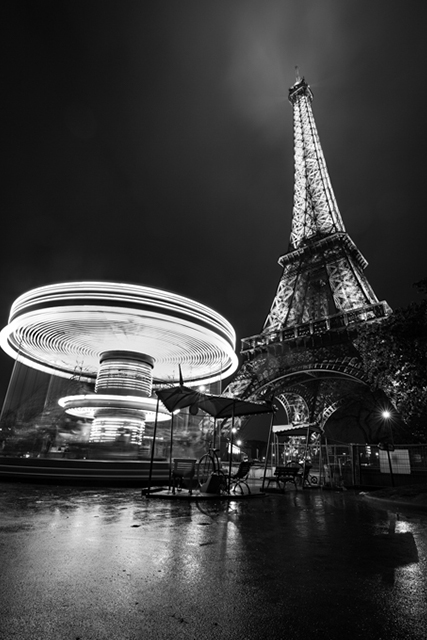
From fun fair rides to escalators, once you have learnt the basics of long exposure techniques you will find many creative ways to put them into practice. Experiment with different settings to see what happens to your image and don’t forget to have a bit of fun with it.
TIPS:

The Weather
One thing to be aware of when doing long exposures outdoors is the weather. Strong wind can cause movement while rain (or spray from a waterfall) on your lens or filter will clearly visible when shooting at narrow apertures. In these conditions check your lens and review your images between every shot.
Battery Life
During long exposures your camera is working harder and for longer. Long exposure photography can therefore drain your batteries quicker. If you are shooting on a cold morning/evening this too can impact battery performance and so you should always carry spares.
All images copyright Matt Parry unless otherwise indicated.